Spring Security
SpringSecurity 安全管理框架 ( 之后简称 security ) 是基于过滤器实现的权限验证功能,他可以验证用户的身份以及所拥有的权限来判断你是否具有访问目标资源的条件
安全管理框架除了 security 之外还有 shiro 也可以实现相同的功能,相比之下 security 就笨重一些,但是相对的带来的好处就是相比 shiro,security 对于访问权限的把控细粒度比较好
笔记基于 Springboot 2.4.0 的 web 程序通过 Java 代码 + 注解的方式进行配置 ( 不使用 xml 配置文件 )
快速开始
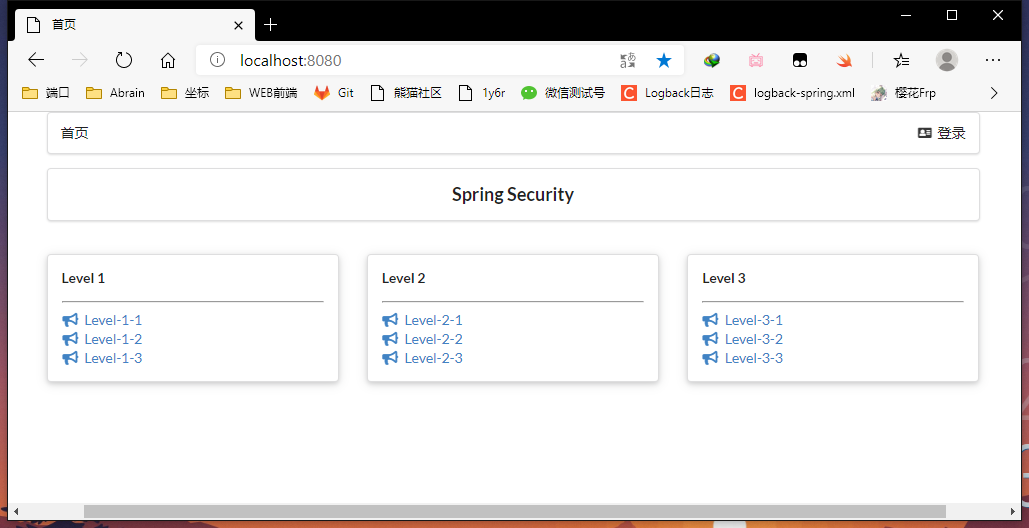
创建好 boot 程序之后,导入静态素材页面至 templates 目录下,配置好三个 level 的视图 ( 页面来自狂神说 ) 跳转就可以开始练习了
boot 项目添加 security 环境需要在项目创建时勾选 security 模块,或者手动在 pom 文件中添加场景启动器:
1
2
3
4
5
|
<dependency>
<groupId>org.springframework.boot</groupId>
<artifactId>spring-boot-starter-security</artifactId>
</dependency>
|
当我们将依赖引入后,无需做任何的配置,security 就已经开始工作了,他默认会验证所有请求只有登录的情况下才可以访问,并且为我们提供了登录页面:
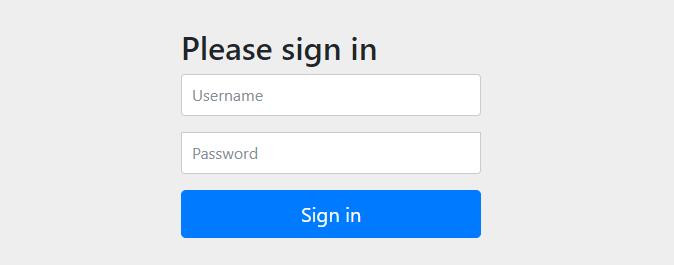
security 默认提供的登录用户名为 user,登录密码是随机分配的,通过查看程序启动日志就可以看到:
1
| Using generated security password: f20e3e53-b7fc-4a3b-9d53-f6cc57b9c586
|
输入用户名密码后我们就可以登录了,security 非常的智能,他会记录被拦截之前访问的页面,登录后 security 会重新访问该页面以方便操作,这就是 security 最简单的登录验证了
访问权限设置(一)
请求的授权验证和放行
我们可以看到,security 的默认配置连 index 首页也访问不了,这不是我想要的,我们要调整一下页面的访问权限,这里需要创建 security 的配置类:
1
2
3
4
5
6
7
|
@EnableWebSecurity
public class SecurityConfig extends WebSecurityConfigurerAdapter {}
|
配置类创建好了,接下来需要复写其中的 configure 方法来自定义访问权限,这里需要注意的是重写的方法是重载方法,参数列表为:HttpSecurity http 不要重写错了,代码如下:
1
2
3
4
5
6
7
8
9
10
11
12
13
14
15
16
17
|
@EnableWebSecurity
public class SecurityConfig extends WebSecurityConfigurerAdapter {
@Override
protected void configure(HttpSecurity http) throws Exception {
http.authorizeRequests()
.antMatchers("/", "/index.html")
.permitAll()
.anyRequest()
.authenticated();
}
}
|
- 所有关于请求验证方面的操作都需要在 http.authorizeRequests() 下进行
对哪些请求操作可以通过 antMatchers 进行添加,例如对 / 或者对 index.html 请求进行操作,anyRequest 代表剩下的所有请求,而具体执行什么操作可以通过 permitAll 和 authenticated 进行设置
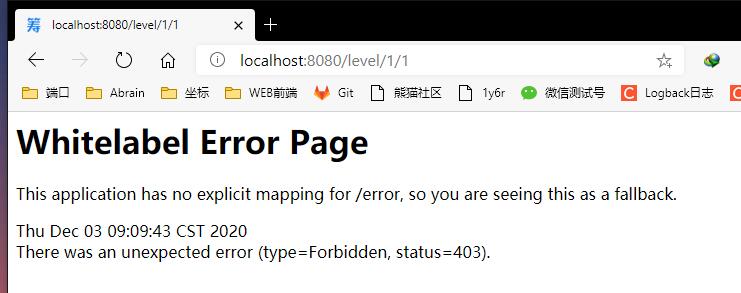
如上设置后,就可以在未登录的情况下访问 index 程序首页,而访问 level1 2 3 等就需要进行登录,直接访问会提示 403 Forbidden 没有权限访问
登录表单设置
简单登录授权
上面通过重写 configure(HttpSecurity http) 方法实现了请求的授权与放行,以及授权失败后的 403 页面,但是之前我们没有设置的时候他会自动跳转到登录页面,这个时候我们就需要添加一下表单的相关设置了
之前说过 authorizeRequests 是根据请求进行授权验证,验证部分结束后开始进行表单方面设置,需要使用 formLogin 来对表单进行操作,当进行两种不同操作的时候,中间需要用 and() 连接
1
2
3
4
5
6
7
8
9
10
11
12
| @EnableWebSecurity
public class SecurityConfig extends WebSecurityConfigurerAdapter {
@Override
protected void configure(HttpSecurity http) throws Exception {
http.authorizeRequests()
.antMatchers("/", "/index.html").permitAll()
.anyRequest().authenticated()
.and()
.formLogin();
}
}
|
添加 formLogin 之后,访问 level 1 2 3 页面就会自动跳转到 security 为我们提供的登录页,输入用户名密码后所有页面就都可以访问了
自定义登录设置
登录页面设置
security 为我们提供了登录页面很方便,但是有点不太好看,我们在程序中要求每个页面都要贴合主题的,这个页面未免有些太突兀了,所以这里我们要自定义登录页面:
1
2
3
4
5
6
7
8
9
10
11
12
13
14
| @EnableWebSecurity
public class SecurityConfig extends WebSecurityConfigurerAdapter {
@Override
protected void configure(HttpSecurity http) throws Exception {
http.authorizeRequests()
.antMatchers("/", "/index.html", "/toLogin",
"/views/login.html", "/login")
.permitAll().anyRequest().authenticated()
.and()
.formLogin()
.loginPage("/toLogin");
}
}
|
简单配置 loginPage 之后,我们的自定义登录页就完成了,接下来我们修改修改一下表单的 name 以及提交地址
修改表单提交地址以及表单项
security 提供的登录页表单的 name 和提交的 action 地址都是预设好的,所以这里我们要先获取一下然后放到自己的登录页面中
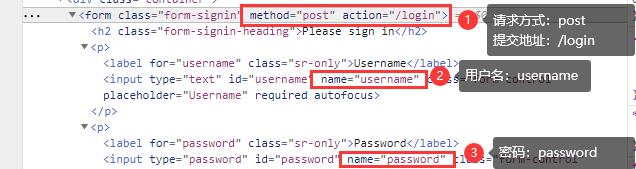
当我们配置好要求后去进行登录,结果 请求的地址不存在404,这是因为我们在自定义登录页面的同时也影响到了表单提交地址,表单的提交地址和自定义的登录地址相同,也就是说我们通过 get 请求访问 toLogin 跳转到了登录页面,然后需要通过 post 请求访问 toLogin 进行登录
1
2
3
4
5
6
7
8
9
10
11
| @Override
protected void configure(HttpSecurity http) throws Exception {
http.authorizeRequests()
.antMatchers("/", "/index.html", "/toLogin",
"/views/login.html", "/doLogin")
.permitAll().anyRequest().authenticated()
.and()
.formLogin()
.loginPage("/toLogin")
.loginProcessingUrl("/doLogin");
}
|
有些时候我们的登录名并不是 username 以及 password,可能是一些其他的值,而且表单的提交地址也不想和页面使用同一个地址,这里我们都可以通过自定义操作来完成
1
2
3
4
5
6
7
8
9
10
11
12
13
14
| @Override
protected void configure(HttpSecurity http) throws Exception {
http.authorizeRequests()
.antMatchers("/", "/index.html", "/toLogin",
"/views/login.html", "/doLogin")
.permitAll().anyRequest().authenticated()
.and()
.formLogin()
.loginPage("/toLogin")
.loginProcessingUrl("/doLogin")
.usernameParameter("name")
.passwordParameter("pwd")
.loginProcessingUrl("/doLogin");
}
|
登录成功后的视图跳转
这里了解一下登录成功和失败的页面跳转处理
1
2
3
4
5
6
7
8
9
10
11
12
13
14
15
16
17
18
19
20
| @EnableWebSecurity
public class SecurityConfig extends WebSecurityConfigurerAdapter {
@Override
protected void configure(HttpSecurity http) throws Exception {
http.authorizeRequests()
.antMatchers("/", "/index.html", "/toLogin","/views/login.html",
"/doLogin", "/toPage/success")
.permitAll().anyRequest().authenticated()
.and()
.formLogin()
.loginPage("/toLogin")
.loginProcessingUrl("/doLogin")
.usernameParameter("name")
.passwordParameter("pwd")
.defaultSuccessUrl("/toPage/success")
.failureUrl("/toPage/error");
}
}
|
- 这里需要注意的是
defaultSuccessUrl 设置的是默认成功的页面,但如果是通过访问其他页面被过滤后跳转到登录页的话,这项设置就不会起作用
用户登录设置
之前我们登录时都是通过日志提供的用户名密码进行登录,接下来我们就使用自己的用户进行登录
我们在实现请求验证以及表单操作的时候都是复写了父类的 configure(HttpSecurity http) 完成操作的,接下来的用户登录相关操作需要复写另外一个方法:configure(AuthenticationManagerBuilder auth)
内存模拟登录
首先复写父类中的函数,然后配置内存模拟登陆,需要提一嘴的是高版本的 security 要求必须使用加密:
1
2
3
4
5
6
7
8
9
10
11
12
13
| @Override
protected void configure(AuthenticationManagerBuilder auth) throws Exception {
PasswordEncoder noEncrypt = NoOpPasswordEncoder.getInstance();
auth.inMemoryAuthentication()
.passwordEncoder(noEncrypt)
.withUser("zhang")
.password("hanzhe")
.authorities("用户列表:查询")
.and()
.withUser("admin")
.password("admin")
.roles("管理员");
}
|
inMemoryAuthentication:代表用户信息在内存中取passwordEncoder:高版本的 security 要求必须对登录密码进行加密,但是我们测试时不想使用加密,所以就通过 NoOpPasswordEncoder 获取了实例,这个实例并不会对密码进行加密,他作用就是占个位,从而实现配置了加密的同时不执行加密操作,加密具体后面会提withUser:添加用户,需要传入用户名进行登录,后面紧跟的几个方法就是当前用户的 password 密码,roles 角色和 authorities 权限等,通过 and 可以无限链接添加用户- 注意事项:
- 每个用户应至少拥有一个角色或者权限,否则不允许登录
- 角色和权限的命名都不允许使用 “ROLE_” 开头
这样一来内存模拟登录就简单完成了,启动程序后最明显的就是日志中不会在提供 user 用户,我们可以通过自己添加的用户进行登录。
连接数据库登录
前置准备:entity dao service
这里简单偷个懒,在Service中写了假数据没有 dao没连数据库,不过道理是一样的
上面我们通过 inMemoryAuthentication 来模拟内存登录,接下来通过 UserDetailsService 来进行登录,准备好实体类以及 service:
1
2
3
4
5
6
7
8
|
@Data
@NoArgsConstructor
@AllArgsConstructor
public class UserEntity {
private String username;
private String password;
}
|
1
2
3
4
5
6
7
8
9
10
11
12
13
14
15
16
17
18
19
20
21
|
@Service
public class UserService {
private List<UserEntity> userList = null;
public void initUserList() {
userList = new ArrayList<>();
userList.add(new UserEntity("zhang", "18D7044C8EAF484A1C498379BA770E1E"));
userList.add(new UserEntity("admin", "21232F297A57A5A743894A0E4A801FC3"));
}
public UserEntity selectUserByUsername(String username){
this.initUserList();
List<UserEntity> collect = userList.stream()
.filter(item -> item.getUsername().equals(username))
.collect(Collectors.toList());
return collect.size() == 1 ? collect.get(0) : null;
}
}
|
配置类代码
之前配置在内存中登录时使用的是 auth.inMemoryAuthentication() 方法,这回配置数据库登录后使用的是 auth.userDetailsService 方法,这里需要传入 UserDetailsService 的实例,而UserDetailsService 实际上是一个接口,而且是支持函数式的接口,这里就使用 lambda 表达式进行操作:
1
2
3
4
5
6
7
8
9
10
11
12
13
14
15
16
17
18
19
20
21
22
23
24
| @Autowired
private UserService userService;
@Override
protected void configure(AuthenticationManagerBuilder auth) throws Exception {
PasswordEncoder noEncrypt = NoOpPasswordEncoder.getInstance();
auth.userDetailsService((String username)->{
List<GrantedAuthority> authorities = new ArrayList<>();
UserEntity userEntity = userService.selectUserByUsername(username);
if ( "admin".equals(username) )
authorities.add(new SimpleGrantedAuthority("ROLE_管理员"));
else authorities.add(new SimpleGrantedAuthority("用户列表:查询"));
return new User(username, userEntity.getPassword(), authorities);
}).passwordEncoder(noEncrypt);
}
|
这样一来就配置完成了,只要自行连接数据库通过 service 调用 dao,这就是一个数据库的登录
关于加密配置
无论是内存模拟登录 inMemoryAuthentication 还是数据库登录 userDetailsService,在用户信息配置完成之后都会调用 passwordEncoder 传入一个加密实例进行密码加密,之前图省事用了 NoOpPasswordEncoder 的实例,他的作用是不对密码进行加密操作,当我们在真实开发环境下的时候数据库是不建议存储明文密码的,所以在 security 中加密是必须配置的,这里就了解一下如何配置加密
使用MD5加密
首先准备 MD5 的加密工具类
1
2
3
4
5
6
7
8
9
10
11
12
13
| public class MD5Util {
public static String toMD5(String source){
String target = null;
try {
MessageDigest md5 = MessageDigest.getInstance("MD5");
byte[] digest = md5.digest(source.getBytes());
target = new BigInteger(1, digest).toString(16).toUpperCase();
} catch (NoSuchAlgorithmException e) {
e.printStackTrace();
}
return target;
}
}
|
创建Security的密码加密配置类
点进 passwordEncoder 方法,我们可以看到他需要的是 PasswordEncoder 的实例,那就创建一个类来实现这个 PasswordEncoder 接口类来自定义加密:
1
2
3
4
5
6
7
8
9
10
11
12
13
14
15
|
public class PwdEncoderConfig implements PasswordEncoder {
@Override
public String encode(CharSequence rawPassword) {
return MD5Util.toMD5(rawPassword.toString());
}
@Override
public boolean matches(CharSequence rawPassword, String encodedPassword) {
return MD5Util.toMD5(rawPassword.toString()).equals(encodedPassword);
}
}
|
回到 Security 配置类配置类中传入加密对象即可
1
2
3
4
5
6
7
| @Override
protected void configure(AuthenticationManagerBuilder auth) throws Exception {
auth.userDetailsService((String username)->{......})
.passwordEncoder(new PwdEncoderConfig());
}
|
将 service 中测试的密码通过 md5 加密一下就可以验证效果了
1
2
| userList.add(new UserEntity("zhang", "18D7044C8EAF484A1C498379BA770E1E"));
userList.add(new UserEntity("admin", "21232F297A57A5A743894A0E4A801FC3"));
|
使用盐值加密
MD5 加密只是我们用来测试自定义加密的联系,MD5 虽然是不可逆的算法,但是加密后的值是一样的,有心人通过暴力破解还是可以成功的,这里我们就要使用 security 推荐的盐值加密,使用方法非常简单:
1
2
3
4
5
6
| @Override
protected void configure(AuthenticationManagerBuilder auth) throws Exception {
auth.userDetailsService((String username)->{......})
.passwordEncoder(new BCryptPasswordEncoder());
}
|
获取登录人信息
在控制器中获取
我们在平时开发中都是讲登录信息存储到 session 中的,在控制器中通过 HttpSession 获取到当前用户的昵称、账号等其他信息,security 的话我们想要获取到信息需要在参数列表中添加以下参数:
1
2
3
4
5
6
7
| @GetMapping("/")
public String toIndex(Principal principal){
System.out.println("登录人信息===>>" + principal);
return "index";
}
|
可以看出,只有 username 和 password 以及角色权限信息,如果我们想要获得更多例如昵称、性别、生日以及注册信息等等都没有提供
仔细一看打印结果,发现用户信息都封装在了 org.springframework.security.core.userdetails.User 类中,这个类在练习【登录用户设置 → 连接数据库登录】时将用户信息以及角色权限封装的位置用过,这么说来我们获取的其实是这个类的信息,那么我们来修改一下之前的代码
创建新的类继承 security 的 User 类
在新的 UserSecurityEntity 类中声明一个 entity 属性,代表当前登录人的实体,并对外提供 get 方法
1
2
3
4
5
6
7
8
9
10
11
12
13
14
15
16
17
|
public class UserSecurityEntity extends User {
private UserEntity entity;
public UserSecurityEntity(
UserEntity entity,
Collection<GrantedAuthority> authorities) {
super(entity.getUsername(), entity.getPassword(), authorities);
entity.setPassword("******");
this.entity = entity;
}
public UserEntity getEntity() {
return this.entity;
}
}
|
修改之前的数据库登录代码
1
2
3
4
5
6
7
| @Override
protected void configure(AuthenticationManagerBuilder auth) throws Exception {
auth.userDetailsService((String username)->{
return new UserSecurityEntity(userEntity, authorities);
}).passwordEncoder(new PwdEncoderConfig());
}
|
现在回到控制器中在查看打印出来的结果:
1
| 登录人信息===>>UsernamePasswordAuthenticationToken [Principal=site.hanzhe.security.UserSecurityEntity [Username=zhang...
|
可以看到,里面已经有我们刚刚创建好的那个类了,接下来我们来通过类型转换来获取到 entity 就万事大吉啦
1
2
3
4
5
6
7
8
| @GetMapping("/")
public String toLevelX(Principal principal){
Object p = ((UsernamePasswordAuthenticationToken) principal).getPrincipal();
UserEntity entity = ((UserSecurityEntity) p).getEntity();
System.out.println(entity);
return "/index";
}
|
在页面上获取
在页面上使用 thymeleaf 除了场景启动器之外还需要添加另一个依赖:
1
2
3
4
5
|
<dependency>
<groupId>org.thymeleaf.extras</groupId>
<artifactId>thymeleaf-extras-springsecurity5</artifactId>
</dependency>
|
添加好依赖后,还需要在对应使用 security 的页面中添加 sec 的引用:
1
2
3
4
5
6
7
| <html xmlns="http://www.w3.org/1999/xhtml"
xmlns:th="http://www.thymeleaf.org"
xmlns:sec="http://www.thymeleaf.org/thymeleaf-extras-springsecurity5">
|
在页面中获取到 entity 信息 ( 基于之前修改好的代码才可以这么获取 ):
1
| <p sec:authentication="principal.entity"></p>
|
记住我登录状态
我们登录成功之后可以访问所有页面,根据正常流程来说当我重启浏览器后再次访问这个页面时,他会让我们你重新登录,现在我们要实现一劳永逸的方法,security 为我们提供了 记住我 功能,通过 Cookie 实现了重启浏览器也可以保持登录状态,而开启这个功能只需要一个方法即可
1
2
3
4
5
6
7
| @Override
protected void configure(HttpSecurity http) throws Exception {
http.authorizeRequests()
........
.rememberMe()
.rememberMeParameter("remember");
}
|
注销登录状态
之前我们通过移除 session 中的登录信息来实现退出登录,使用 security 后一直通过关闭浏览器的方式进行登录注销,在学习了 " 记住我 " 登录状态之后连关闭浏览器都可以保持登录状态了, 所以这里学习一下注销登录
注销登录的操作也非常简单,和登陆的表单设置差不多,只需要开启功能并指定控制器的 URL 即可:
1
2
3
4
5
6
7
8
9
10
11
| @Override
protected void configure(HttpSecurity http) throws Exception {
http.authorizeRequests()
......
.rememberMe()
.rememberMeParameter("remember")
.and()
.logout()
.logoutUrl("/doLogout")
.logoutSuccessUrl("/");
}
|
这样 security 的配置就完成了,这里我选择将退出功能放到 level1/1 的页面中:
1
2
3
4
5
6
7
8
9
10
|
<div class="ui container">
<div th:replace="~{index::nav-menu}"></div>
<div class="ui segment" style="text-align: center">
<h3>Level-1-1</h3>
<a th:href="@{/}">返回首页</a>
<a th:href="@{/doLogout}">退出登录</a>
</div>
</div>
|
注销的控制器完成了,点击注销的超链接也完成了,接下来我们来测试一下结果:
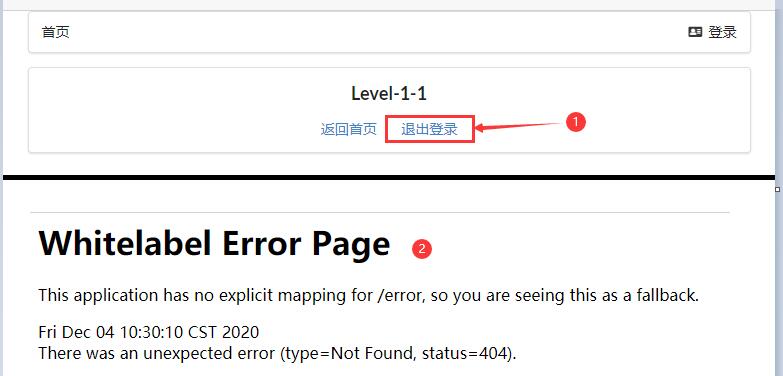
结果点击退出登录之后提示 404 了,这是因为 security 出于安全考虑配置了防止跨站请求伪造 ( CSRF ),他要求我们的请求必须是 POST 请求,且需要携带参数 token 参数,之前的登录表单虽然我们没有添加 token 参数,但是仔细看请求信息的时候还是可以看出 scurity 自动为我们添加了这个参数:

我们的注销没有携带 token 参数并且不是 POST 请求,为了省事这里选择关闭 CSRF 功能:
1
2
3
4
5
6
7
8
9
10
11
12
| @Override
protected void configure(HttpSecurity http) throws Exception {
http.authorizeRequests()
......
.rememberMe()
.rememberMeParameter("remember")
.and()
.csrf().disable()
.logout()
.logoutUrl("/doLogout")
.logoutSuccessUrl("/");
}
|
**扩展:**有一个和 csrf().disable() 长得非常像的一段代码需要注意一下:.cors().disable(),这个通常在前后端分离的情况使用,用于关闭跨域请求
访问权限设置(二)
之前简单学习了一下访问权限设置,可以设置哪些页面可以直接访问、哪些页面需要登录后访问、还可以自定义登录页面、参数名称以及表单请求地址、登录的成功失败分别跳转的视图,接下来配合角色和权限实现权限控制
Java代码控制授权
通过权限控制访问权限
首先调整一下测试数据,为他们分配合适的角色及权限:zhang 具有 vip 权限,admin 具有所有权限
1
2
3
4
5
6
7
8
9
10
11
12
13
14
15
|
@Override
protected void configure(AuthenticationManagerBuilder auth) throws Exception {
auth.userDetailsService((String username)->{
UserEntity userEntity = userService.selectUserByUsername(username);
List<GrantedAuthority> authorities = new ArrayList<>();
if ( "admin".equals(username) ){
authorities.add(new SimpleGrantedAuthority("vip1"));
authorities.add(new SimpleGrantedAuthority("vip2"));
authorities.add(new SimpleGrantedAuthority("vip3"));
} else authorities.add(new SimpleGrantedAuthority("vip1"));
return new UserSecurityEntity(userEntity, authorities);
}).passwordEncoder(new PwdEncoderConfig());
}
|
然后将请求资源设置权限,只有应有的权限才能访问对应的页面:
1
2
3
4
5
6
7
8
9
10
11
12
13
14
15
16
17
18
19
20
21
|
@Override
protected void configure(HttpSecurity http) throws Exception {
http.authorizeRequests()
.antMatchers("/", "/index.html", "/toLogin","/views/login.html",
"/login", "/doLogin", "/toPage/success", "/doLogout")
.permitAll()
.antMatchers("/level1/*")
.hasAnyAuthority("vip1")
.antMatchers("/level2/*")
.hasAnyAuthority("vip2")
.antMatchers("/level3/*")
.hasAnyAuthority("vip3")
.anyRequest()
.authenticated()
........
}
|
| 方法名 |
作用 |
| hasAuthority |
必须拥有目标权限才能访问 |
| hasAnyAuthority |
必须拥有目标权限 ( 可传多个参数 ) 才能访问 |
通过角色控制访问权限
之前通过权限判断是否有访问资格,这次通过角色判断,代码实际上差不了多少:
1
2
3
4
5
6
7
8
9
10
11
12
13
14
|
@Override
protected void configure(AuthenticationManagerBuilder auth) throws Exception {
auth.userDetailsService((String username)->{
UserEntity userEntity = userService.selectUserByUsername(username);
List<GrantedAuthority> authorities = new ArrayList<>();
if ( "admin".equals(username) ){
authorities.add(new SimpleGrantedAuthority("ROLE_普通会员"));
authorities.add(new SimpleGrantedAuthority("ROLE_高级会员"));
authorities.add(new SimpleGrantedAuthority("ROLE_超级会员"));
} else authorities.add(new SimpleGrantedAuthority("ROLE_普通会员"));
return new UserSecurityEntity(userEntity, authorities);
}).passwordEncoder(new PwdEncoderConfig());
}
|
1
2
3
4
5
6
7
8
9
10
11
12
13
14
15
16
|
@Override
protected void configure(HttpSecurity http) throws Exception {
http.authorizeRequests()
.antMatchers("/", "/index.html", "/toLogin","/views/login.html",
"/login", "/doLogin", "/toPage/success", "/doLogout")
.permitAll()
.antMatchers("/level1/*")
.hasRole("普通会员")
.antMatchers("/level2/*")
.hasRole("高级会员")
.antMatchers("/level3/*")
.hasRole("超级会员")
.anyRequest()
.authenticated();
}
|
| 方法名 |
作用 |
| hasRole |
必须拥有目标角色才能访问 |
| hasAnyRole |
必须拥有目标角色 ( 可传多个参数 ) 才能访问 |
同时验证权限和角色
可以通过权限验证,或者也可以通过角色验证,那么能不能两个混用呢?可以的: